The bundle of paid and free Photoshop textures presented in this article is the result of a collaboration between Ben Heine and FixThePhoto.com. They were created to help users improve the quality of their photos and pictures with a few clicks. By applying them, you can emphasize the details in the frame and make them look creative. You can use these textures to add an interesting pattern of a leaf or stone, create clouds in the sky, a wooden surface, a rusty stain, etc. Learn more about Best Free and Paid Photoshop Textures for Your Designs.
The textures are available in a JPG format. You can apply them to RAW and JPG files. They are compatible with all Photoshop versions, starting with CS4, and synced with Adobe Creative Cloud.
How to Work with Photoshop Textures
To apply these Photoshop textures to your shots, follow the following steps.
Step 1. Choose a texture and copy it
Open a Photoshop texture in a tab near the original photo. Find the “Select” menu at the top of the screen, open it, and click “All.” This way, you will select the whole texture. You will see an outline around it. Next, open the “Edit” menu at the top of the screen, and click on “Copy.”
Step 2. Insert the texture into the document with your photo
Now, find the window with a photo and go to the “Edit” menu. Click on the “Paste.” The texture will be inserted into a new layer located above the photo.
Step 3. Change the size if it is necessary
Use the Free Transform command to make the sizes of the photo and the texture match.
Step 4. Switch between blending modes
In the top left corner of the Layers panel, you will find the layer blending feature. The Normal mode is selected by default. If you click on the “Normal,” you will see a list of options (Screen, Multiply, Overlay). Test the blending modes to see how they work and choose the one you like most.
Step 5. Decrease the color saturation of the texture
If you need to preserve the original color gamut of the shot, you should reduce the saturation.
Step 6. Decrease the opacity of the texture
You can also decrease the opacity of the layer if the applied Photoshop texture looks too catchy. Go to the Layers panel, you will find this feature opposite the blending modes.
On the list below, you will find paid and free Photoshop textures that may be applied to various shots, including portraits, street, real estate and landscape photography.
1. Free Photoshop Textures Bundle
Make your photos more appealing by adding a free and flawless texture. It can imitate a marble surface or grass, anything you may want to add looking truly realistic. It is a perfect way to emphasize a specific object in the frame.
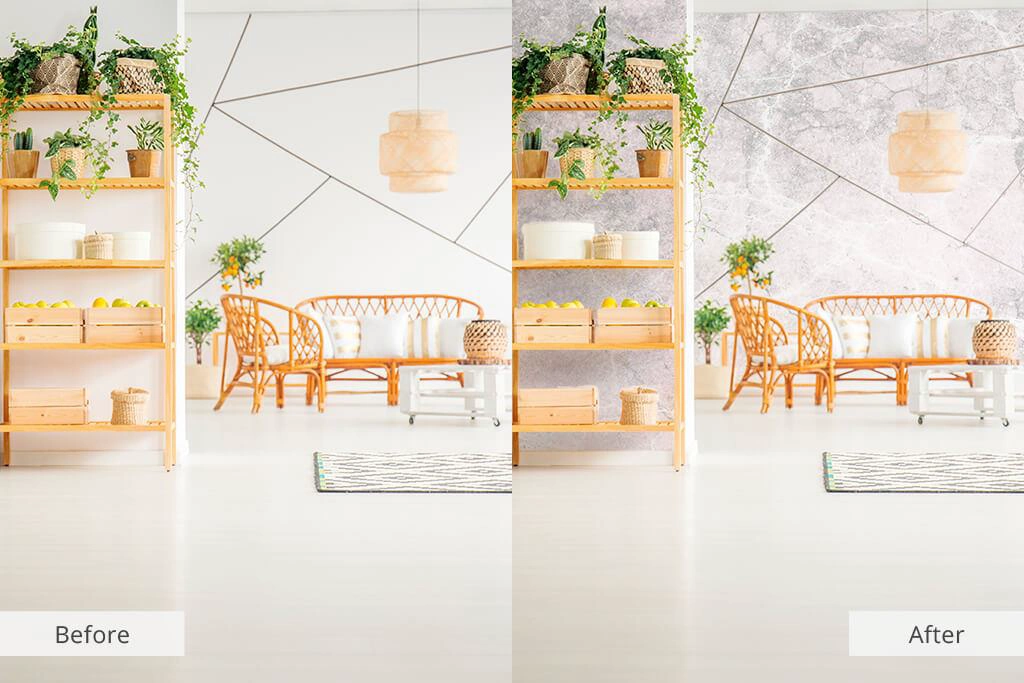
2. Free Dramatic Photoshop Textures
This Photoshop texture looks original and captivating. Use it to make your shots atmospheric and dramatic. Plus, you can add accents to the frame. You can experiment with these textures by applying them to real estate, interior, or product photography.
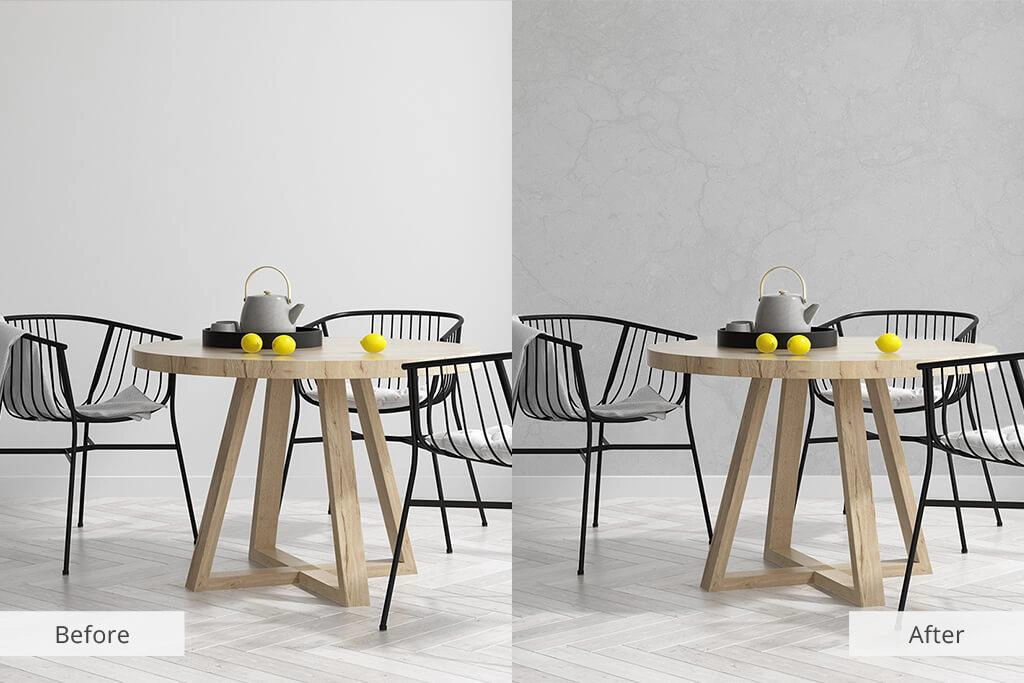
3. Grunge Photoshop Textures

This bundle includes 34 textures with different levels of grain and dirt. Apply them to add muted tones, gloomy shades, and scratches to your images. This way you will achieve the aging effect. These grunge textures might serve as a background or a mask. They will add a grunge look to your projects.
4. Water Photoshop Textures
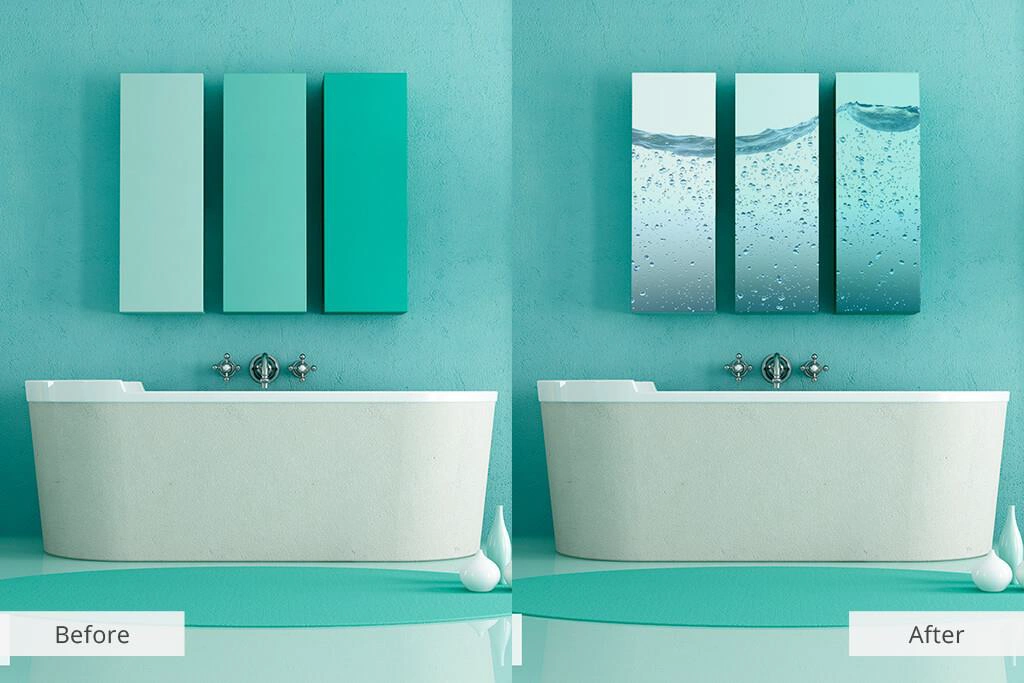
The Water Photoshop Texture set includes 50 appealing effects to enhance your vacation images. By applying them, you will make your images more appealing and dramatic. The bundle includes various water textures that differ in colors and patterns.
The effects enhance the water in the frame by making it sky-blue, clean, and transparent (you can achieve transparency by adjusting the opacity sliders).
5. Brick Wall Photoshop Textures
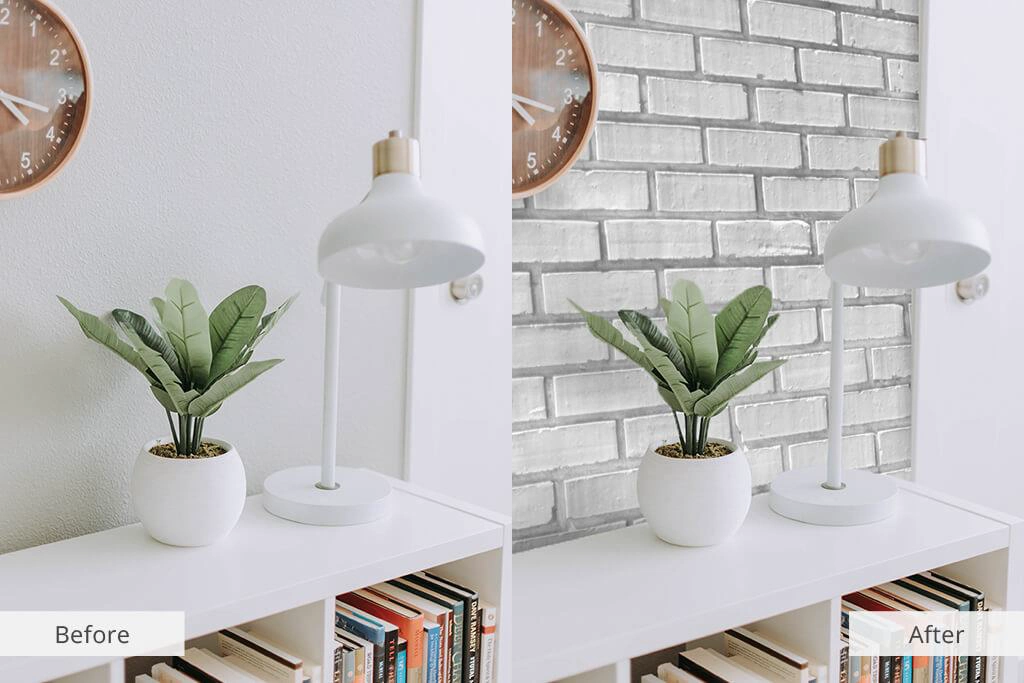
The bundle includes 30 brick styles, starting with classic red and white and ending with maroon and black. This Photoshop texture bundle is a perfect pack for interior shots, lifestyle, and street photography.
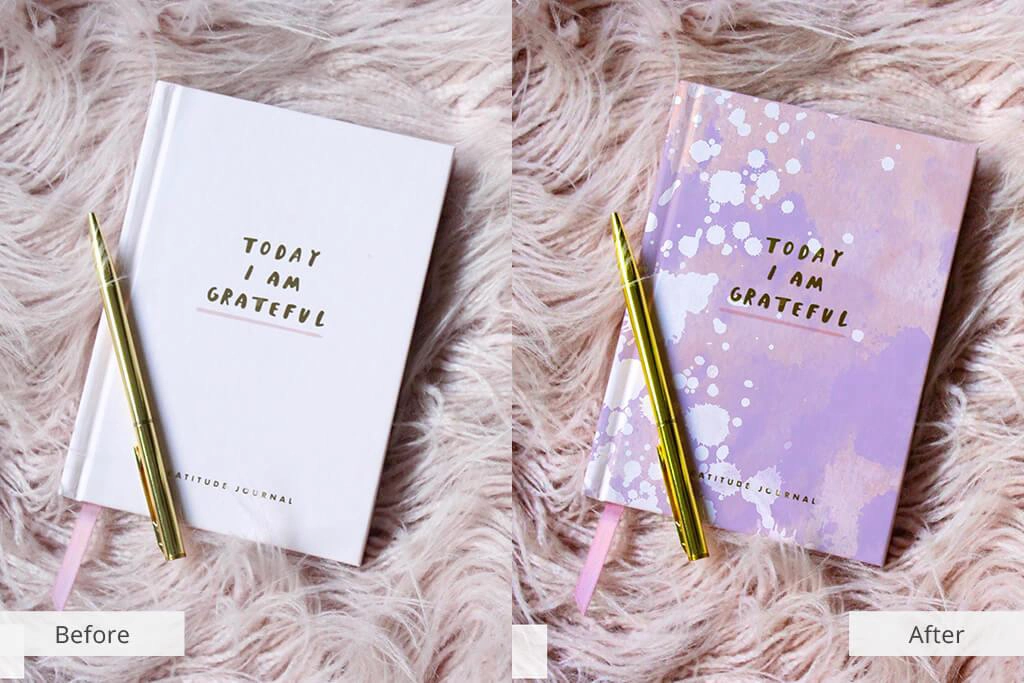
6. Watercolor Fuchsia Photoshop Textures
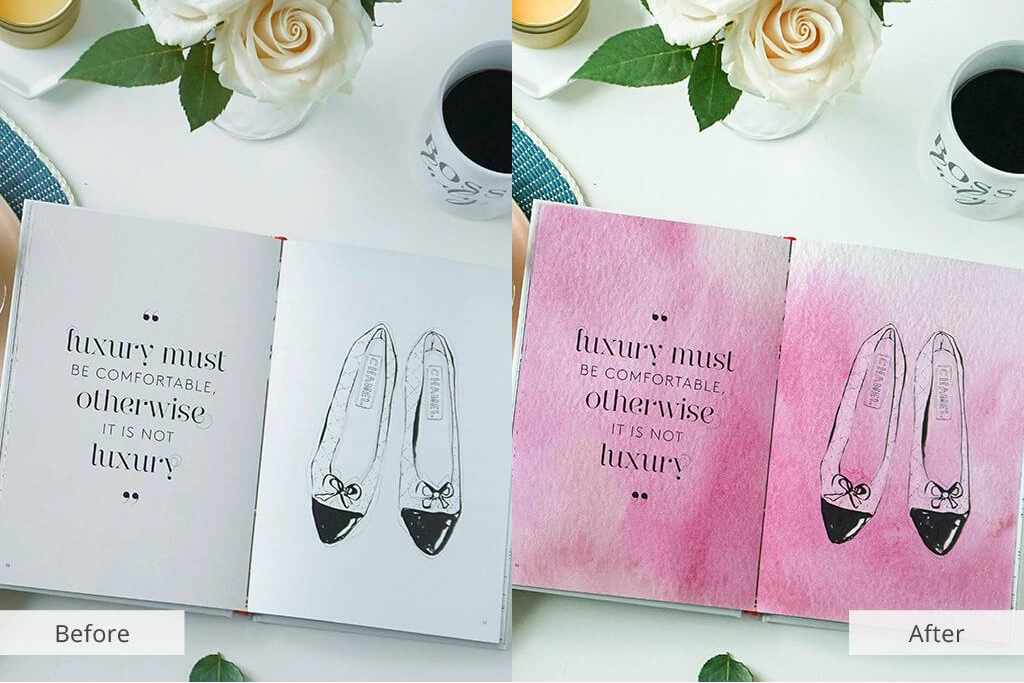
This collection includes 20 bright textures that will help you improve the appearance of books, vases, dishware, furniture, and walls. The texture might serve as an interesting background or decorate an object. You can also regulate the brightness and saturation of the tint.
7. Green Grass Photoshop Textures
This Photoshop texture bundle is great for images containing grass. The effects make grass clearer and more detailed. What’s more, you can apply these textures to repair bad zones in your landscape, real estate, or wildlife shots. Thanks to their high resolution, they will not look too stretched or blurry in your pictures. H3 8. Natural Sand Photoshop Textures

8. Natural Sand Photoshop Textures
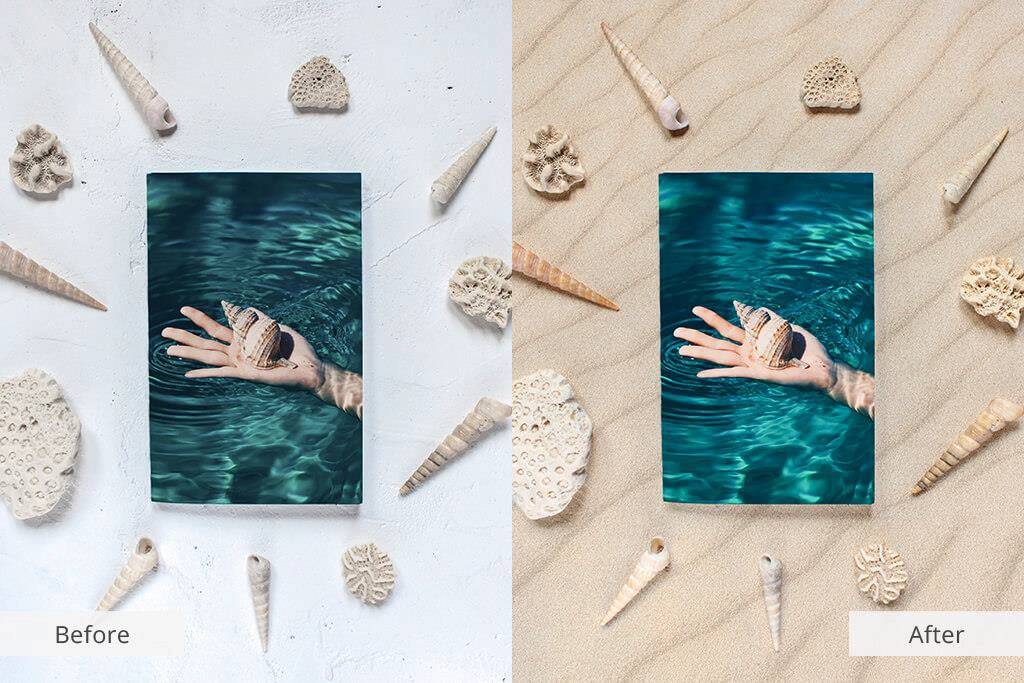
These Photoshop textures will make an image softer by adding sand effects to the frame. The set offers different types of sand, like desert sand texture, dune sand, white sand texture, etc. The bundle contains 40 textures you can easily apply to photos in various genres.
9. Modern Fabric Photoshop Textures
If you want to enhance your images with textile effects, this bundle is exactly what you need. The set offers stylish fabric textures that imitate cotton, denim, linen, lycra, silk, etc. You can experiment with 30 Ps effects to create a subtle look in the frame. The collection might be handy for shooters, crafters, fashion, and web designers.
10. Natural Tree Photoshop Textures

Need to make your images look dramatic? Check out the set of 100 tree textures that will help you emphasize the main subject and details. Each Photoshop texture from this collection will perfectly fit a project that needs a detailed tree image.
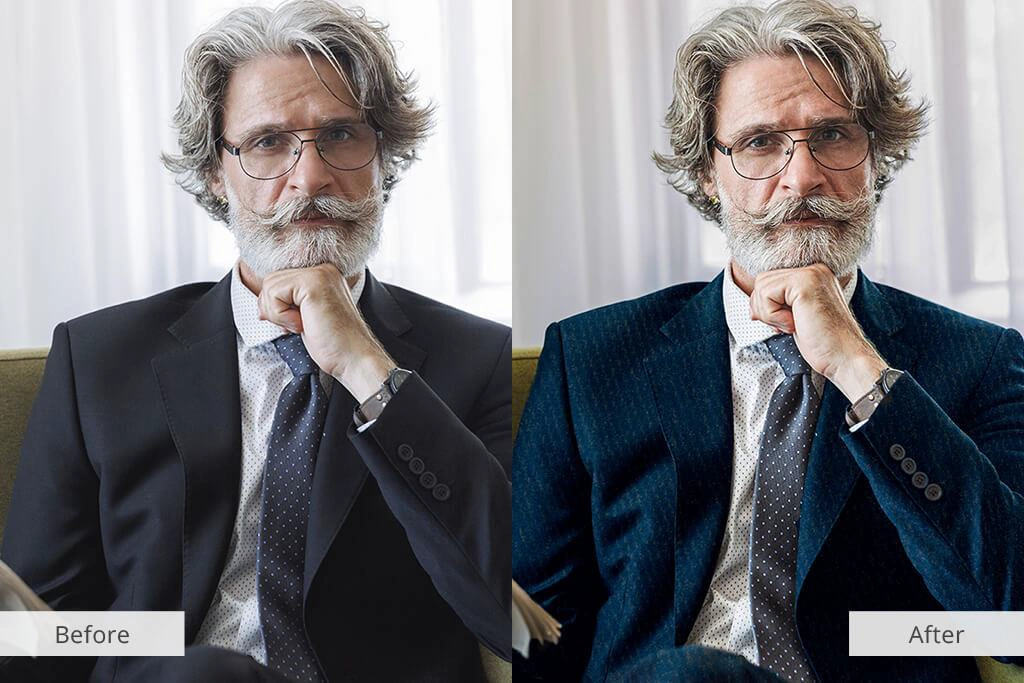
11. Hand Painted Photoshop Textures
This bundle is an ideal match for portrait shots. Apply these textures to improve your pictures with creative strokes. You can decorate clothes or paint an object in the frame. The tools offer different colors, starting with soft and bright and ending with cool and rough ones.
 DOWNLOAD FREE


9 Comments on "Best Free and Paid Photoshop Textures for Your Designs"
Would you like to share your thoughts?
Your email address will not be published. Required fields are marked *